


Prevention
When it comes to pests, prevention is the best defense. It's far easier—and much more effective—to stop pests before they become established than to deal with an outbreak. Follow these best practices to keep your plants healthy and pest-free.
-
Acclimate Your Seedlings
Follow our seedling-receiving recommendations to ensure new plants are properly acclimated after their journey to your home. This helps reduce stress and keeps them less vulnerable to pests. -
Maintain Your Device
A consistent maintenance routine keeps both your plants and your growing system clean. Fresh water, clean modules, and well-pruned plants create conditions that make pest infestations far less likely. Think of it this way: just like people, healthy plants are less likely to “catch” bugs. -
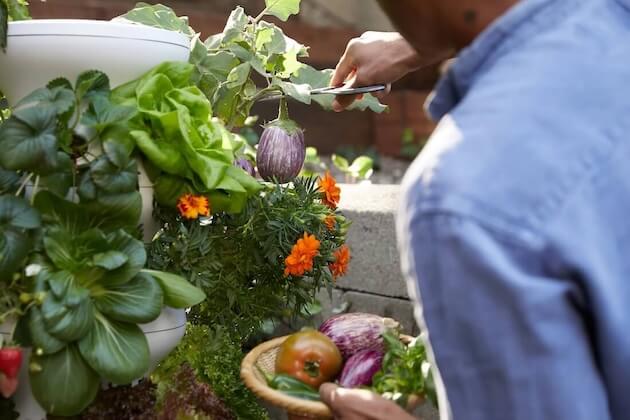
Scout Regularly
Scouting means closely inspecting your plants—especially the undersides of leaves, where pests often hide. Look for tiny insects as well as signs of damage, which are often easier to spot than the pests themselves. Regular scouting allows you to catch problems early, before populations grow out of control. -
Use Preventative Sprays
Even with the best care, pests can still find their way in. Because they are small and good at hiding, it’s not always possible to detect every intruder. That’s why we recommend periodic preventative treatments using the Arber kit (or a similar product). Preventative sprays help ensure that pest populations never have the chance to get established.
Curative Pest Treatment: Major Pests
Despite your best efforts, pests may still appear—that's simply part of gardening. The good news is that you have several options to control them and protect your plants.
While prevention is always easier than treatment, the following recommendations can help you manage an infestation. If pest pressure is severe, you can also choose to reset your device. Removing all plants, thoroughly cleaning your system, and leaving it empty for 10+ days is often the quickest and most effective way to eliminate an outbreak.
What to Expect with Curative Treatment
The sooner you begin treatment, the easier it is to control pests. Success depends on both the severity of the infestation and the type of pest involved.
The most common pests include:
- Aphids
- Fungus gnats
- Caterpillars
- Thrips
- Spider mites
- Leaf miners
With the exception of fungus gnats, treating established pest infestations can require patience and consistency. If your stand has heavy pest pressure, consider whether treatment or resetting is the better option.
Pros
- You can continue growing your existing plants.
- Managing a pest outbreak can be a valuable learning experience.
Cons
- Severe infestations (entire leaves covered with insects) can be difficult and time-consuming to control.
- Treatment may require more time and effort than simply resetting and starting fresh.
Fungus Gnat Treatment
Fungus gnats are generally easier to manage than other pests. We recommend:
We recommend:
- Hang yellow sticky cards near your grow stand or insert them into grow cups. Fungus gnats are attracted to yellow and become trapped. Replace cards every growing cycle.
- If growing indoors, run a gentle fan nearby to disturb adult gnats and encourage them toward the sticky traps.
- Apply a hydrogen peroxide solution (1 part 3% food-grade hydrogen peroxide to 4 parts water) to the top ½ inch of the grow medium to target larvae living near the surface.
Aphids, Thrips, and Spider Mites Treatment
These pests are more difficult to eliminate, especially once populations become established.
Low to Medium Pressure
(1–3 plants with fewer than 5 visible pests each)
-
-
Apply Arber insecticide or another option, such as insecticidal soap or pyrethrins.
-
Treat 1–2 times per week (indoors: apply when lights are off; outdoors: in the early morning or evening).
-
Repeat for 3 weeks.
-
Continue scouting regularly and follow up with preventative sprays once per month.
-
High Pressure
(3+ plants with more than 5 pests each)
-
-
Remove all plants from your stand.
-
Rinse plants thoroughly with a hose or in the sink to wash off pests.
-
Once plants are dry, apply Arber or another insecticide as directed (typically 1–2 times per week).
-
Repeat rinsing weekly if pests persist.
-
Pest ID:
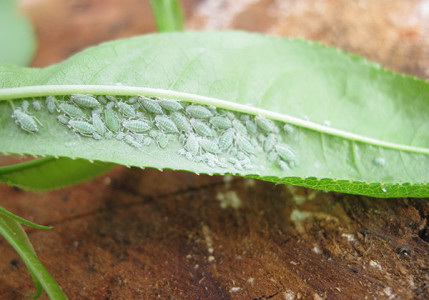
Aphids
Nymphs
Small with green, yellow, black or gray bodies. Look for white exoskeletons on tops of leaves (easier to find since they don’t move, hide, and seeing the white on green is easier). Can also leave a sticky sap residue on leaves.
Adults:
Can be light green or black. Black ones can be mistaken for fungus gnats, but they move much slower and don’t actually fly around too much. Can be easily distinguished from the long narrow wings that extend below the body.
If you find honeydew or white molts on your leaves, aphids are likely present.
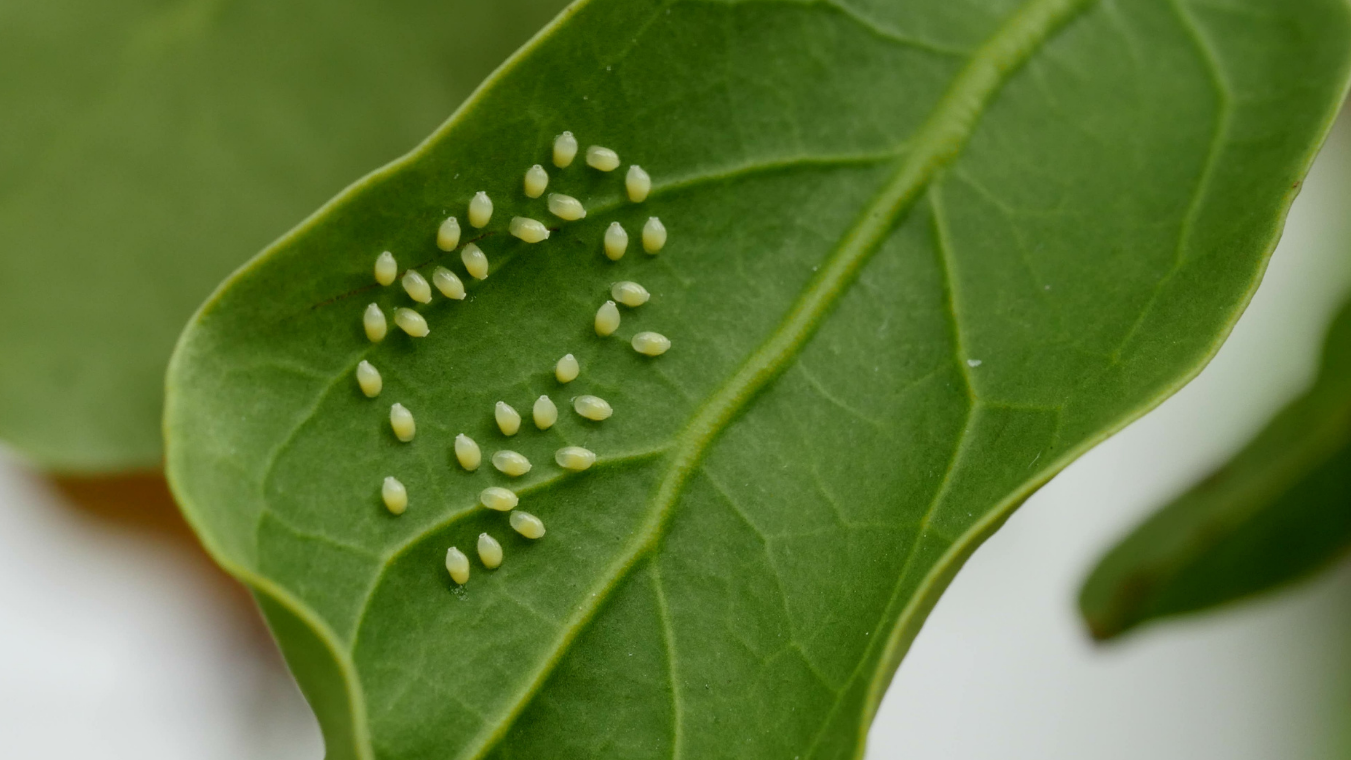
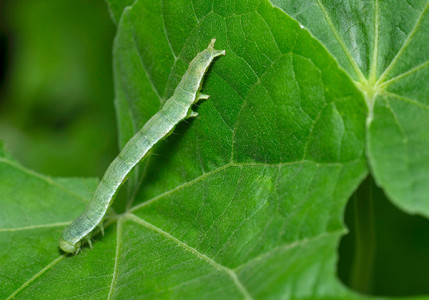
Caterpillars
Most caterpillars are green or brown worms that chew holes completely through leaves and leave behind small black droppings (frass).
They often rest along leaf stems or on the undersides of leaves, making them difficult to spot. They're generally more active later in the morning after temperatures begin to rise.
Fungus Gnats
Fungus gnats are harmless in small numbers and relatively easy to control.
These small flying insects feed primarily on algae and decaying organic matter that naturally develops on the surface of the grow medium. Adult fungus gnats don't damage plants, although they can become a nuisance indoors.
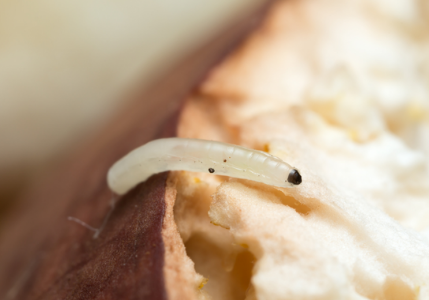
Larvae
Clear, worm-like larvae about ¼ inch long that live near the top of the grow medium.
Adults
Small black flies that resemble tiny mosquitoes. They are attracted to light and are commonly seen hovering around grow lights.
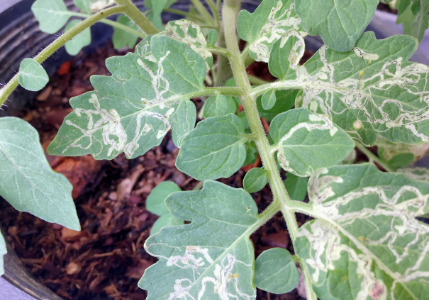
Leaf Miners
Leaf miner activity increases during warm weather and is much less common during fall and winter.
Larvae tunnel through leaf tissue, creating winding trails or "mines." This damage reduces the plant's ability to photosynthesize, decreases yields, and can leave leaves more susceptible to secondary bacterial infections.
Powdery Mildew Treatment
Powdery mildew (often called PM) is one of the most common fungal diseases in edible gardens, especially during warm weather. It most commonly affects squash, zucchini, pumpkins, cucumbers, melons, peas, beans, and brassicas like kale and broccoli.
The good news? Powdery mildew is usually easy to manage when caught early.
What Does It Look Like?
- White or light gray, powdery spots on leaves or stems
- Spots that spread and merge into larger fuzzy patches
- Yellowing, curling, or distorted leaves as the infection progresses

Is It Harmful?
To people and pets: No. Produce with small amounts of powdery mildew is safe to eat after washing.
To plants: Yes. Left untreated, powdery mildew can reduce airflow, slow plant growth, decrease yields, and affect flavor.
Treatment
- Prune heavily affected leaves (no more than one-third of the plant at a time).
- Apply a fungicide, such as Arber Organic Bio Fungicide, 1–2 times per week until symptoms improve.
- Inspect nearby plants and treat them if needed, as powdery mildew spreads easily through airborne spores.
Mites
Spider mites are extremely small and often require a hand lens to identify.
They thrive in warm conditions and reproduce rapidly. Colonies typically live on the undersides of leaves, where they're protected from direct sunlight.
Because they're difficult to see, damage is often noticed first. Look for:
- Yellow or white stippling
- Distorted leaves, flowers, or fruit
- Fine webbing on leaves or stems
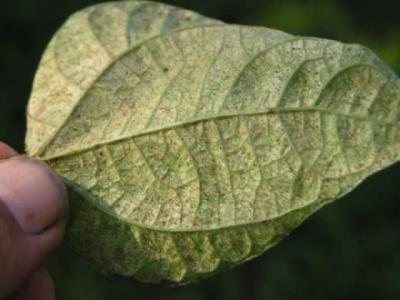
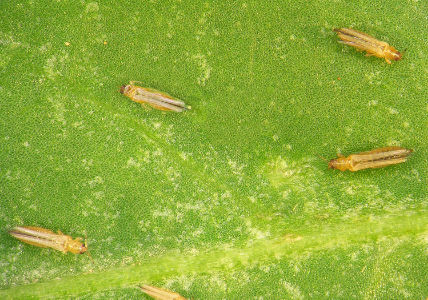
Thrips
Thrips are tiny, fast-moving insects that can be difficult to spot.
Nymphs are easier to identify because of their bright yellow color.
Rather than looking for the insects themselves, look for signs of feeding damage, including:
- Silvery or scratched-looking leaves
- Fine stippling
- Twisted or distorted new growth
- Misshapen flowers