All Resources
FAQ
Growing Guide
Pest Management
Know Before You Grow
Positive Impact
Grower Stories
Seedling Library
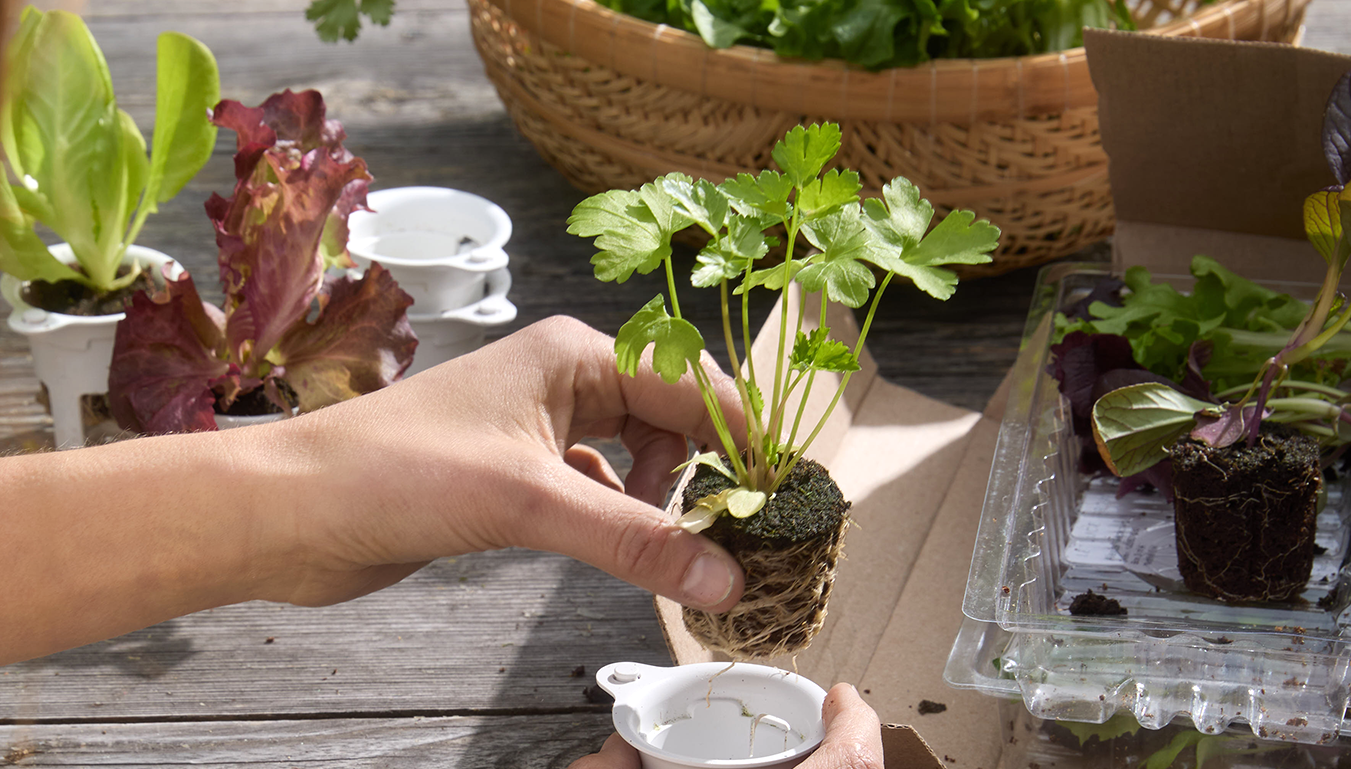
Woohoo, your seedlings are here!
Seedlings need special temperature and hydration care for acclimation success. Follow these instructions to keep them happy and hydrated for up to 3 days:
Open the seedling clamshell and stand it up vertically.
- If
the brown ‘grow medium’ feels dry, splash a
smallamount of water directly onto them- avoid leaves &
donʼt oversaturate. If the ‘grow medium’ feels wet, simply open the clamshell and leave plants indoors in a cool, ventilated space.
Leave them in a cool space indoors for 2+ hrs. Aim to plant in your Farmstand when the outdoor temperature is between 55-80F°. For indoor stands, plant with lights off.
*Transportation can be stressful for seedlings so don’t worry if you get 1-2 that look wilted upon arrival every now and again. Seedlings are extremely resilient and typically perk up after a few days in the farmstand! If your seedlings look weak or unhealthy, follow the above instructions 1-2, then leave them indoors overnight; finally, move them outside to acclimate in full shade the following day before step 3.
**In the rare case that seedlings arrive in an unsalvageable condition or die after being planted, you can report any issues by navigating to https://www.lettucegrow.com/contact-us. We recommend waiting a week before reporting to give your plants time to adjust to their new environment.
Where to Plant Seedlings
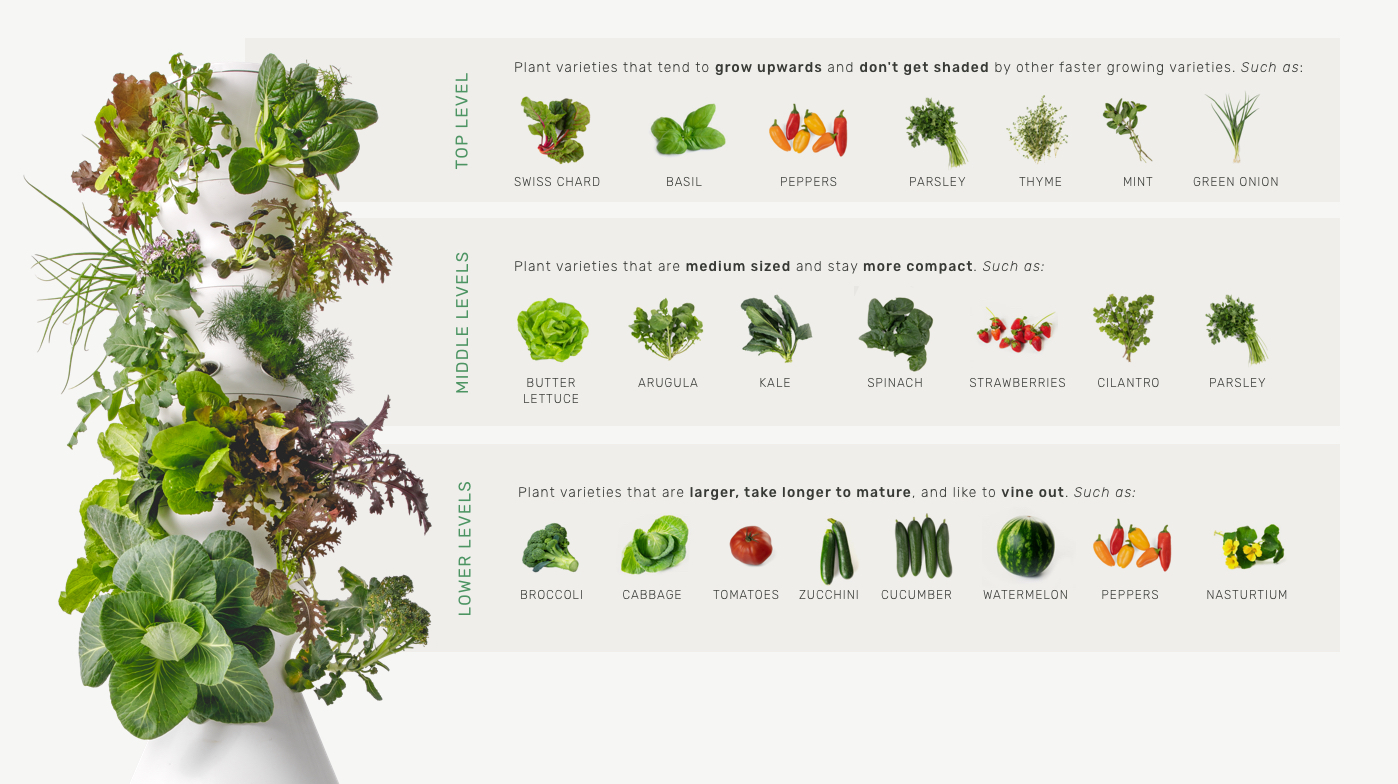
Different plants are better suited for different levels of the Farmstand. Plants that produce large growth should be planted on the bottom level of the Farmstand while plants that produce vertical growth should be planted on the top level of the Farmstand. This keeps growth manageable and prevents other plants from getting shaded out.
You can find location recommendations on the clamshell your seedlings arrive in, on their seedling page, or by referencing the chart below.
Cotyledon Leaves
The first set of leaves a seed produces once it germinates are referred to as cotyledon leaves. Their bean shape looks distinctly different from a plant’s “true” leaves that it produces as it matures. These leaves are called true leaves because their shape and form is what you would normally expect to see.
Over time, cotyledon leaves will become discolored and die off. This is nothing to worry about and not a sign that your seedlings are unhealthy. They can be left on the plant to fall off on their own or they can be cut off.
Nutrient Residue and Algae
A thin white layer of nutrient residue or green algae may develop on the top of your seedlings’ grow medium. This is caused by nutrients settling over time and drying in between watering cycles or the sun reacting with the nutrients when the grow medium is saturated with water. It is a normal occurrence in hydroponics and nothing to worry about!
Learn more about our seedlings here!
Additional Notes
It will take about a week for your seedlings to really get growing - you'll see much faster growth in weeks two, three, and four. If you want to know when to expect different varieties to be harvest-ready, check out our seedling pages.
Your seedlings might take a day or two to adjust to their new environment. If any seedlings didn't make it, contact our Customer Service team for replacements.
If you've lost track of which plant is which, use the Lettuce Grow app to ID those babies! Download our app for iOS and Android.
.
As you get ready to harvest, make sure to reorder more seedlings from our shop!
READY FOR THE NEXT STEP?
REVIEW THE PREVIOUS LESSON
DISCOVER MORE
Know Before You Grow
What to Know Before Buying a Farmstand
Considering a Farmstand for your space? Master Lettuce Grow’s guide from hydroponics to non-GMO seedlings. Make your best home-gardening decision!
